Slack is probably the one of the best messaging apps used worldwide by small and large developer teams alike for general communication, conferencing, sharing code etc. But it brings something else to the table.
Slack apps and bots are a super useful concept. These apps can range from small integrations such as reminders, notes and storage to full chat-ops support for large organisations.
Unfortunately, slack apps are infamously difficult to make. They require full dev-tools setup and hours invested in just reading up on the material to get acquainted with the slack development atmosphere. But it needn't be like this.
While there is no shortcut to full dev environments, the initial hustle can somewhat be eased up with the use of a higher level visual programming tool like node-red.
We'll start by gaining some background on the technology we're using and then straight away get started on making the bot.
What is Node-Red ?
Node-RED is a programming tool for wiring together hardware devices, APIs and online services in new and interesting ways.
It provides a browser-based editor that makes it easy to wire together flows using the wide range of nodes in the palette that can be deployed to its runtime in a single-click.
Note that the most important part is that we are ' wiring' things together and making them work. This isn't just in the metaphorical sense, but in quite a literal way. We'll be ' wiring' our components together, which makes the process of programming a little easier.
Slack Apps
I'm assuming that if you're developing for slack then you know a bit about it. Now, to make a bot for our workspace in slack, we have to follow a couple of (boring) steps to set up our bot:
- Go to https://api.slack.com/
- Click on Your Apps
- Click on Create New App
- Enter the app name and choose the workspace for which you'll develop. ( NOTE: Initially we will only be able to develop for our own workspace )

-
Click on Create App to conclude the process
-
You'll come across something like this:

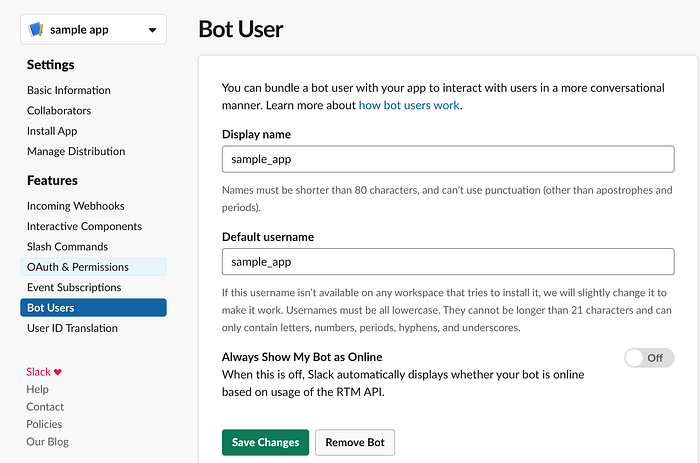
- Now click on the Bots box.

-
Click on Add a Bot User. Set its name.
-
Now that the bot is set, we need to get its token in order to gain access to it. Go to OAuth & Permissions.
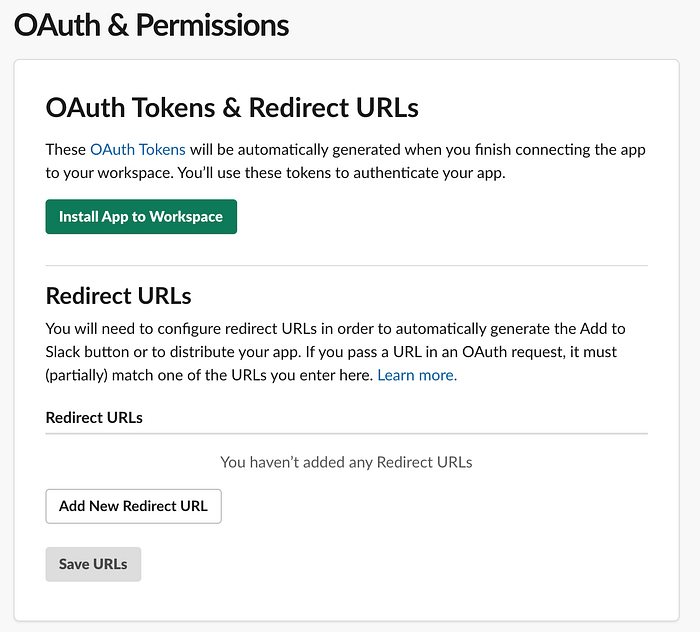
- Click on Install App to Workspace. You'll come across something like this
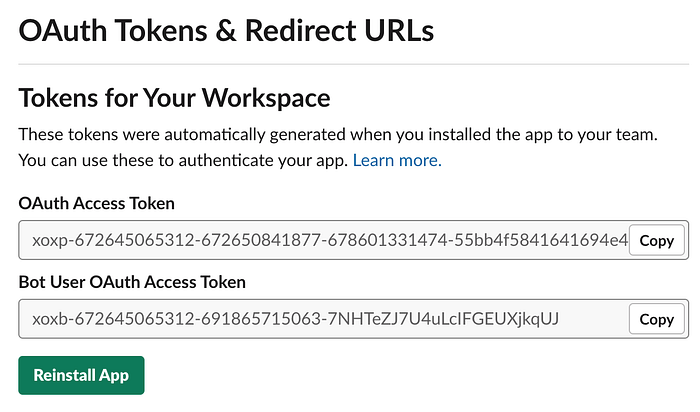
- Copy the Bot User OAuth Access Token and save it somewhere.
That's half of the tedious work done. We have successfully set up our app with our very own bot user. We will now use Node-RED to control the behaviour of this bot.
Setting up Node-RED
To setup Node-RED on our system, we must have Nodejs and Node Package Manager (NPM) already set up on our system.
Follow this link to set up Nodejs
-
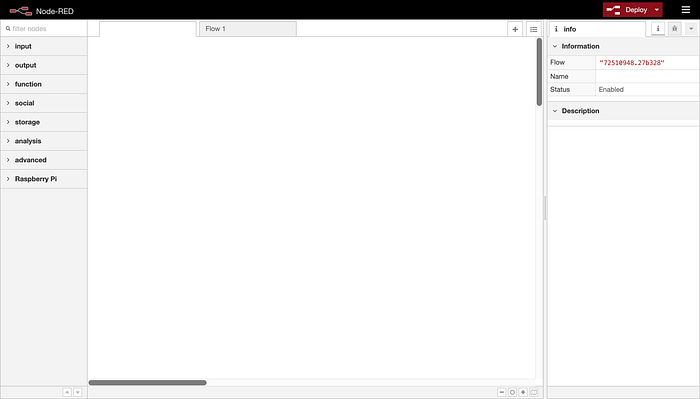
Open your terminal and start the node-red localhost serve r. The
node-redcommand runs the server on localhost:1880 by default. -
Open localhost:1880 in your browser. You might see something like this:
To integrate Node-RED with Slack API, we have to install a package which helps connect it to slack using the Bot User OAuth Access Token mentioned previously.
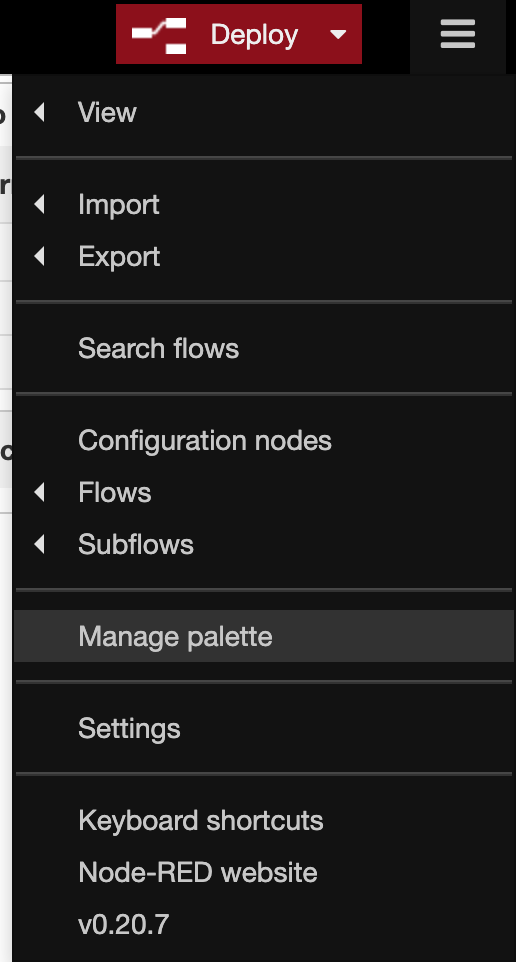
Click on the hamburger icon in the top-right corner and select Manage Palette.
Search for the keyword " slack" in the Install tab. Install the package named node-red-contrib-slack.
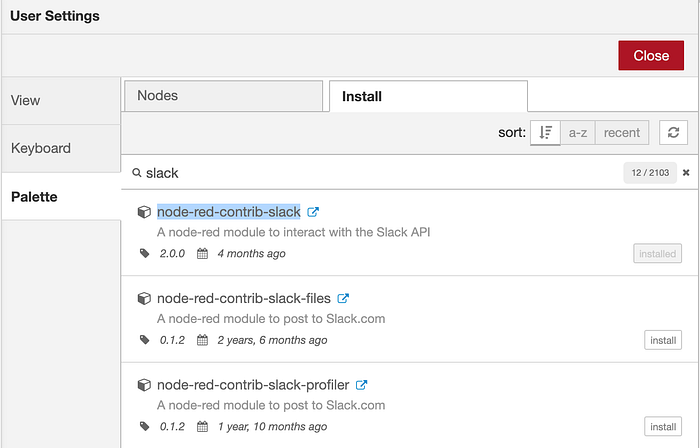
Close the menu.
Now that the package is installed, we can begin making our bot.
The first thing you'll notice is that some new blocks got added to the social tab in our Node-RED palette.

We only need to be concerned about two of the tabs here. The slack-rtm-in and slack-web-out.
The slack-rtm-in block gets activated whenever a message is sent on the workspace the bot has subscribed to. The slack-web-out block is responsible for sending messages on slack on the bot's behalf.
Go ahead and drag them into the workspace. Then double click on one of them to edit the properties.
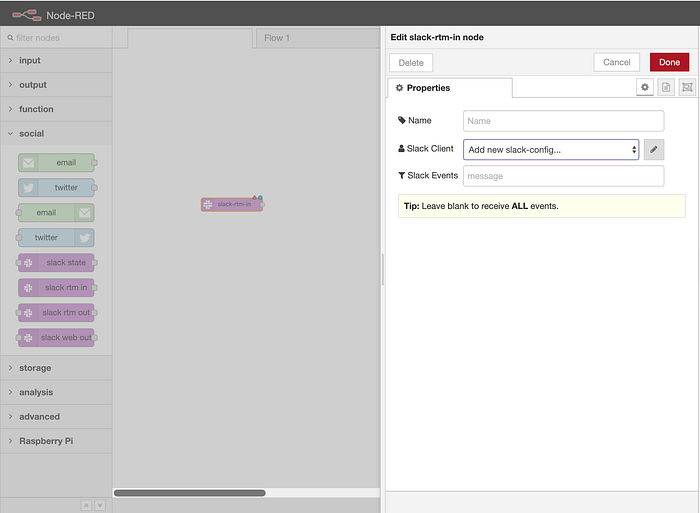
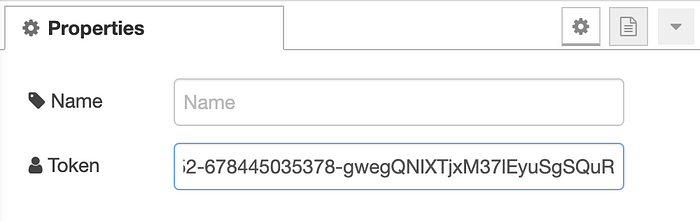
Add a new slack config. Now copy and paste the Bot User OAuth Access Token you had saved earlier.
Congrats ! Our bot has been successfully connected to node-red. Now we only have to design its behaviour.
Defining Bot behaviour
Let's make our bot echo back whatever we message it.
- Drag a function block from the palette and connect it to slack-rtm-in. You can name it filter-input.

- Paste the following code in it.
// ignore anything but messages
if (msg.payload.type != "message") {
    return null;
}// ignore deleted messages
if (msg.payload.subtype == "message_deleted") {
    return null;
}// ignore me_message
if (msg.payload.subtype == "me_message") {
    return null;
}// ignore bot_message
if (msg.payload.subtype == "bot_message") {
    return null;
}msg.user = {
    id: msg.payload.user,
    name: msg.payload.userObject.name
}msg.text = msg.payload.text
msg.channel = msg.payload.channel
return msg;
The code is pretty self-explanatory. All it does is filter the input received (input is in the form of events which are listened to by our bot) so that we only receive the message another user has sent to us either in our DM or a channel to which our bot is added.
The line msg.channel = msg.payload.channel finds out whether the message has been sent to DM (personal) or to a channel.
- Drag another function block from the palette and connect it to the previous block. Paste the following code in it.
msg.topic = "chat.postMessage"
msg.payload = {
    channel: msg.channel,
    text: msg.text
}
return msg;
-
Connect the function block with the slack-web-out block.
-
Click on the Deploy button on the top-right.
(NOTE: The slack-rtm-in and slack-web-out will show " connected" on deployment if everything is good)

Hurray ! Our first bot is ready.
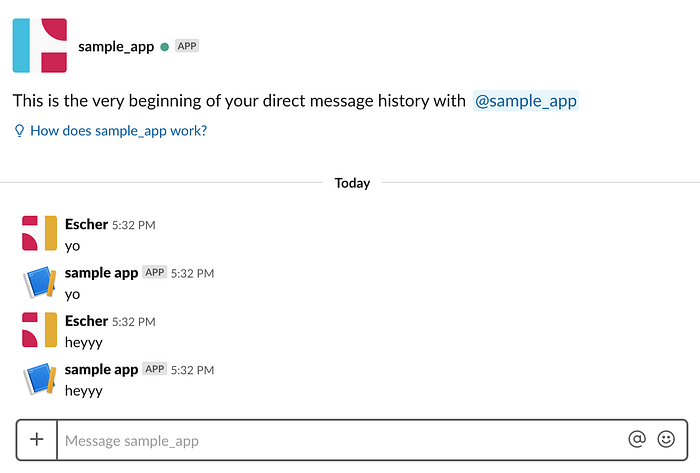
Open slack and DM your bot.
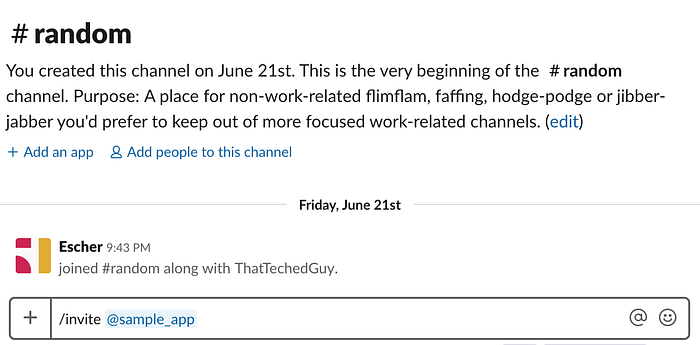
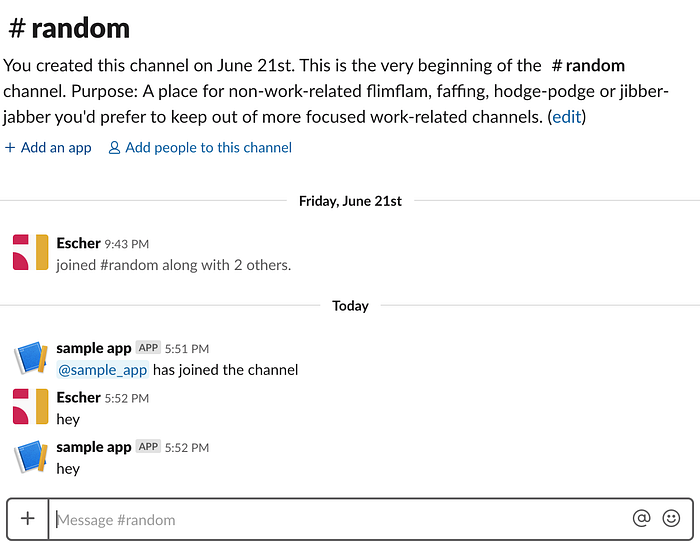
You can also add your bot to a channel in your workspace and message it there. It will message you back on the channel.
Conclusion
Hopefully you found Node-RED as interesting and easy to use as I did. The possibilities with this thing are endless if used properly.
Do let me know if you faced any kind of problem or doubts while setting this up.
Thanks for reading !